Appearance
Work on social media
Use eWizard to prepare consistent, on-brand social media posts in platform-specific formats for social media feeds. The social media content item supports image posts with text and video posts. eVa AI helps you generate content for them if needed.
You can use the content item within your existing eWizard workflows, including localization and MLR review. Approved materials are automatically distributed through a social media management system, and you can export the content for further use.
The general social media workflow includes content creation, editing and sharing, further export, publishing to target systems. Let's take a closer look at these processes.
Creation
You can add a new social media to Library in the following ways:
Create from scratch with the
Social mediaoption from the add new menu. In theCreate newpopup, you can select target social media platform.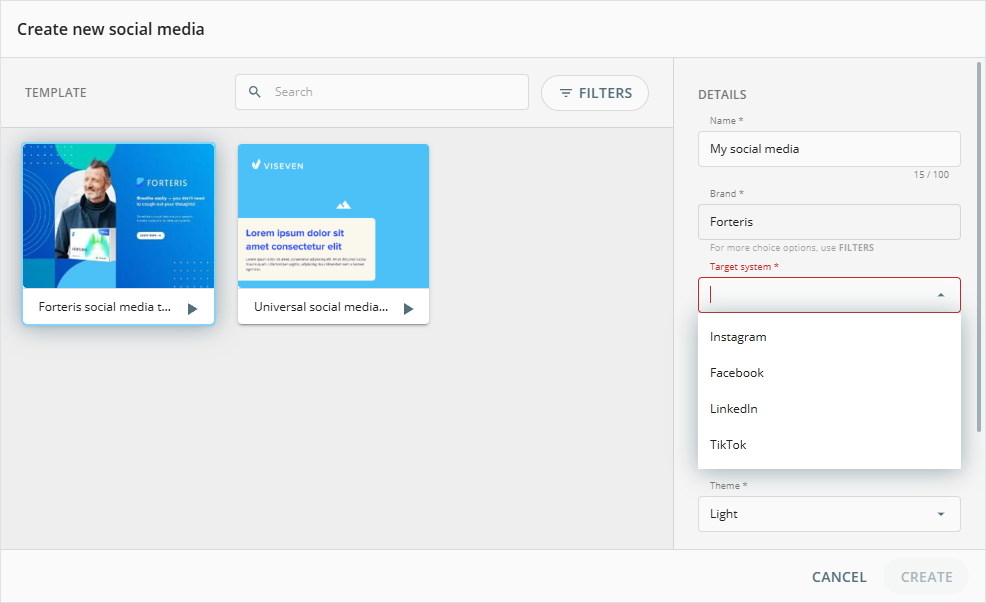
Contact your administrator to add the required options to the following lists:
Target system—a social media platform.Type—a content type predetermined by the target system.
Upload an existing ZIP archive with the social media from your device.
The ZIP archive for upload must be created with the eWizard.js framework.
Upon successful creation or upload, your social media appears in your Library.
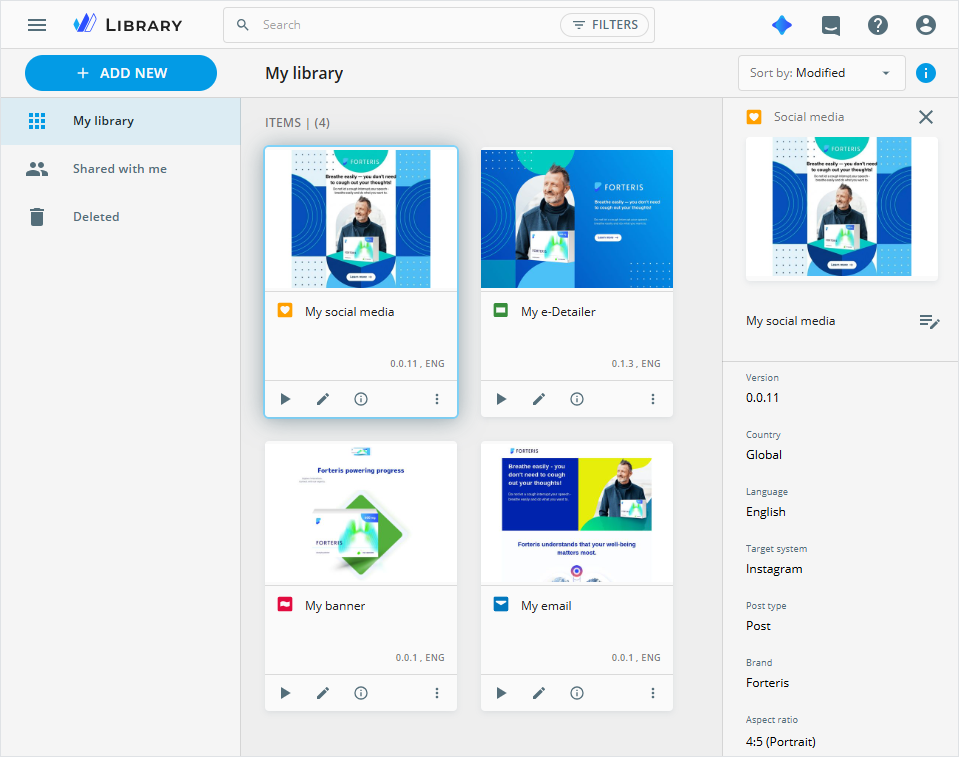
To view all your content items of this type, use the Social media option in the FILTERS menu located on the top panel.
The social media card features its preview, name, version, and language.
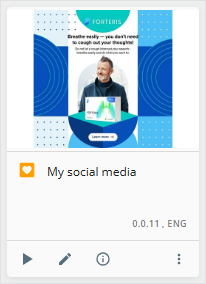
You can also use the buttons on the card to perform the following actions:
| Option | Action |
|---|---|
 | Preview your social media in Viewer that opens in a new tab. |
 | Style the social media in Editor that opens in a new tab. |
 | View the social media metadata and history on the Details page. |
 | Unfold the social media more options to access its additional functions. |
Editing
eWizard Editor for social media provides the tools to structure and customize content for platform-specific formats. You can manage slides as follows:
Move different components to the slide layout, modify their properties and adjust styling.
Select the required default block on the
Blockstab and move it to the slide layout, manually customize its components, or pull assets from Veeva Vault PromoMats.
To open the social media in Editor, click  on its card in Library.
The social media Editor opens in a new browser tab and consists of the following areas:
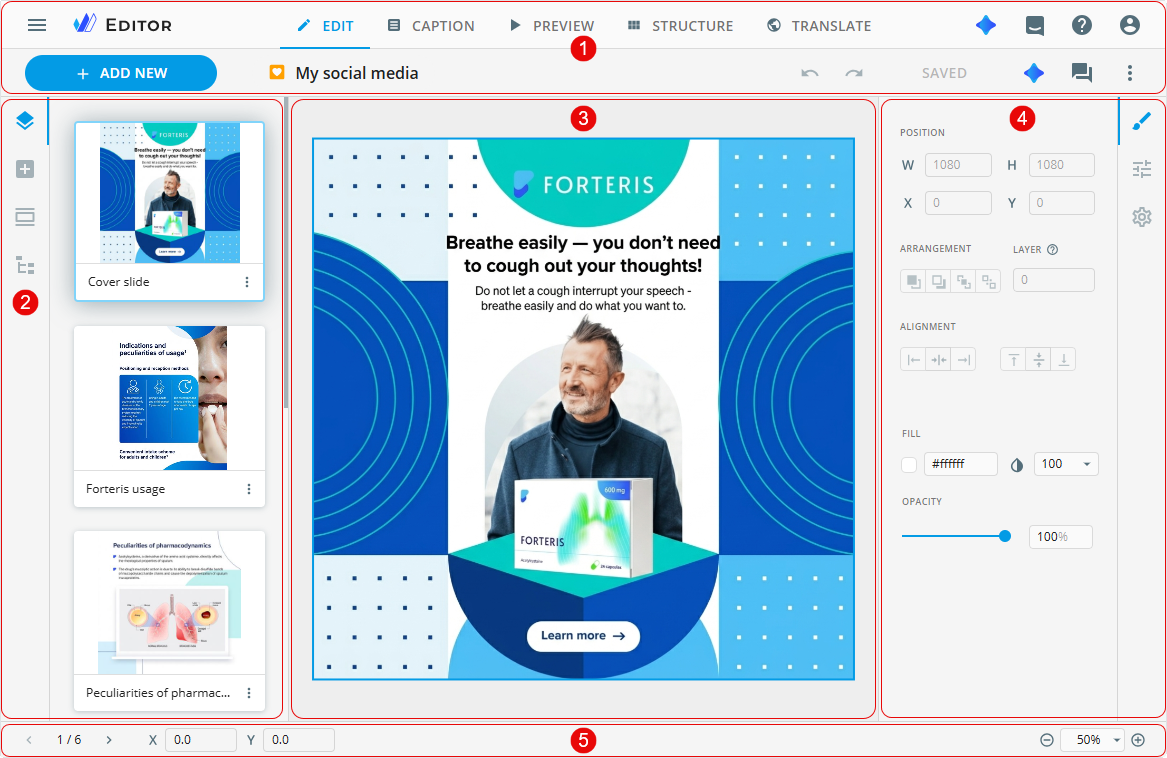
[1] The modes panel to switch between the Editor modes (EDIT, CAPTION, PREVIEW, STRUCTURE, and TRANSLATE) and a quick access toolbar for social media management in the following ways:
| Control | Action |
|---|---|
+ ADD NEW | Add one of the following slide types: • Blank slide—an empty slide with no components. In the Add blank social popup, you can select the width-to-height ratio for the slide. • Slide from template—a pre-designed slide from the social media you're editing. Available types include: ◦ Image—upload images using the Assets popup and add blocks or components. The added block replaces the existing block on the slide, including its styling and components. ◦ Video—upload a video file with a poster using the Assets popup. You can select up to 10 slides to add to your social media. |
Undo | Revert the most recent action or change made. |
Redo | Reapply the action or change that was previously undone. |
SAVE | Apply all the changes you made in the banner. |
eVa AI | Open the eVa AI chat to generate content and receive interactive assistance. |
Comments | Launch the commenting panel. |
More options | Unfold the list of more options available for the banner. |
[2] The elements panel with the following tabs:
[3] The slide layout, where you can arrange various elements to match your editing requirements. Use component multiselect to copy and paste several components to slides within the social media.
[4] Customization panel with the following tabs:
| Tab | Description |
|---|---|
 | Displays the selected component styling. |
 | Displays the selected component properties. |
 | Displays the social media settings. |
[5] The bottom bar with the following controls:
| Control | Action |
|---|---|
 / /  | Navigate between the slides. |
| X-/Y-axis values | Display the position of the selected component upper-left corner and the same corner of the layout. |
 | Scale the layout through its zooming in/out. Or you can select Adaptive view, Full size, Fit to screen, Fit to width from the zoom list. |
Validate the customized social media in the Editor PREVIEW mode or in Viewer.
Sharing
eWizard allows you to share your social media with the collaborators. You can do this in the following ways:
Share link to generate the link to the social media and configure sharing settings.
Assign users to share your social media with specific users according to the defined roles.
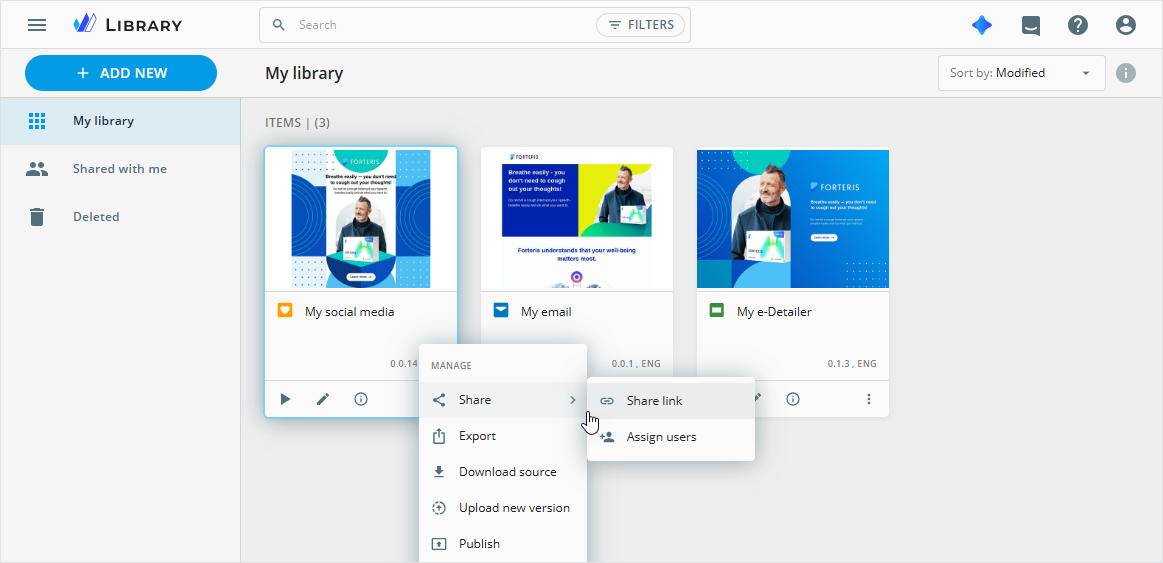
As a result, collaborators can view, edit, or publish the shared social media.
Export
Once your social media is ready for its intended use, you can launch the export from the more options menu.
The following export options are available for social media:
As an assets package. The generated ZIP archive of your social media contains slide images in JPG or PNG format, video files and video posters in their original format, and separate DOCX files for the caption, alt text, and references.
This export option is available on demand. Contact the administrator for details.
As a PDF file. The resulting PDF file contains all slides of your social media for desktop and mobile views, pages with the first frames of the videos and their posters, the
Outbound linkspage with a list of social media links, and a separate page with the caption and theReferenceslist.
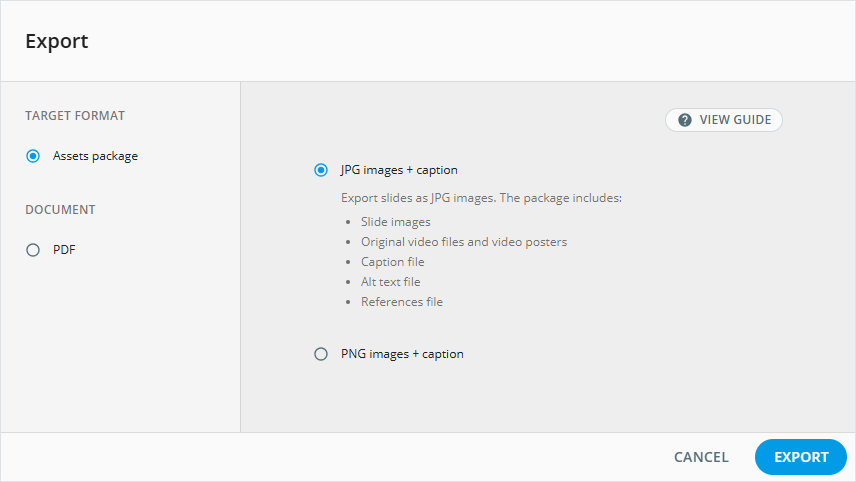
Upon successful export, download the resulting file from the email notification you receive and use it as intended.
Publishing
The eWizard Publish service allows you to submit your prepared social media to a target system with minimal manual operations. As a result, your social media is converted to the necessary build and then placed in the selected target system under your account according to the metadata specified during the publication process.
Social media publishing is initiated with the Publish option from its more menu. Select the target system and follow the publication steps.
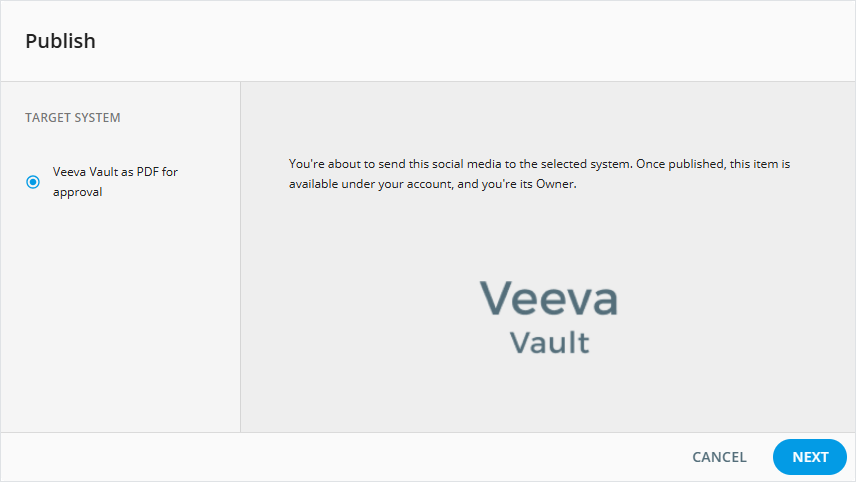
After publication, the social media appears in Veeva Vault PromoMats as a PDF document containing all slides of your content item for desktop and mobile views, pages with the first frames of the videos and their posters, the Outbound links page with a list of social media links, and a separate page with the caption and the References list. If you added Veeva Vault assets to the social media in Editor, they are linked to the PDF document in the Components section on the document Relationships page in Veeva Vault PromoMats.